Oszczędzaj czas korzystając z naszego produktu
Podążaj pięcioma prostymi krokami procesu planowania i zlecania połączeń włókien, aby zawsze mieć aktualne informacje o światłowodach.
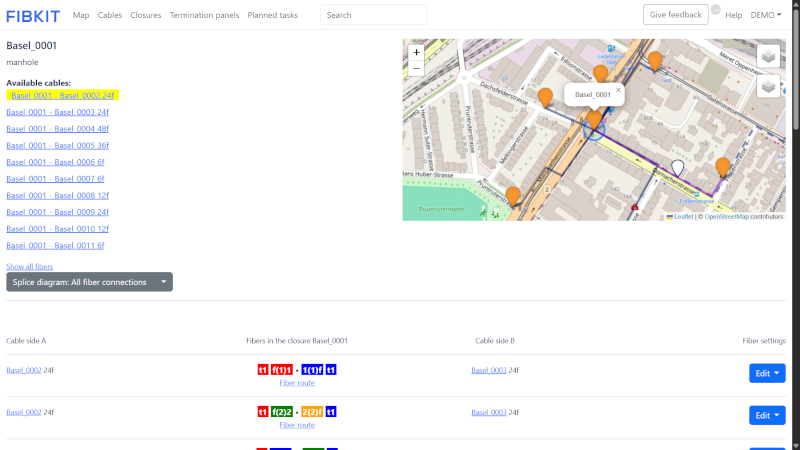
1. Wybierz kabel światłowodowy do spawania
Wybierz punkt spawania, wybierz kabel.

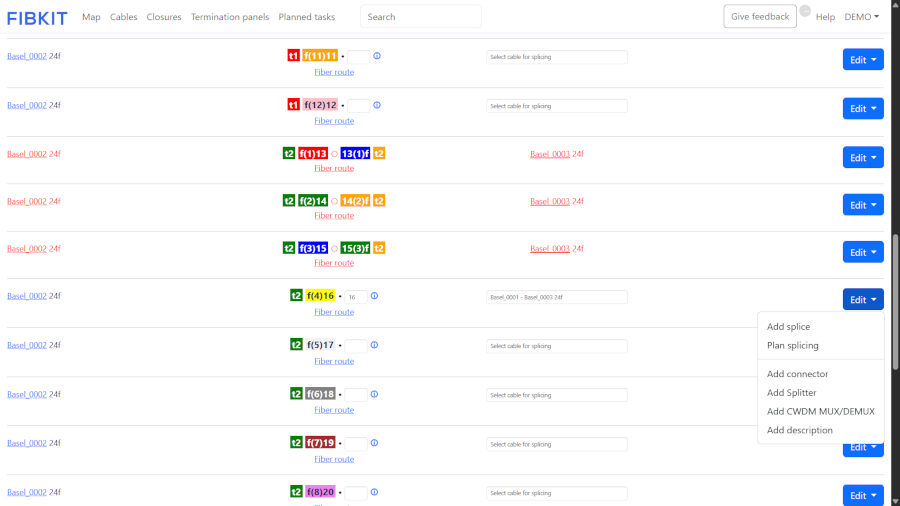
2. Oznacz włókna do spawania
- Przewiń ekran, aby zobaczyć wybrane włókna.
- Gdy włókno jest wybrane z strony A kabla, wprowadź numer włókna ze strony B kabla i wybierz kabel do połączenia z menu rozwijanego. W ustawieniach włókna wybierz opcję Oznacz do spawania.
- Planowane połączenia są wyróżnione na czerwono dla łatwej identyfikacji.
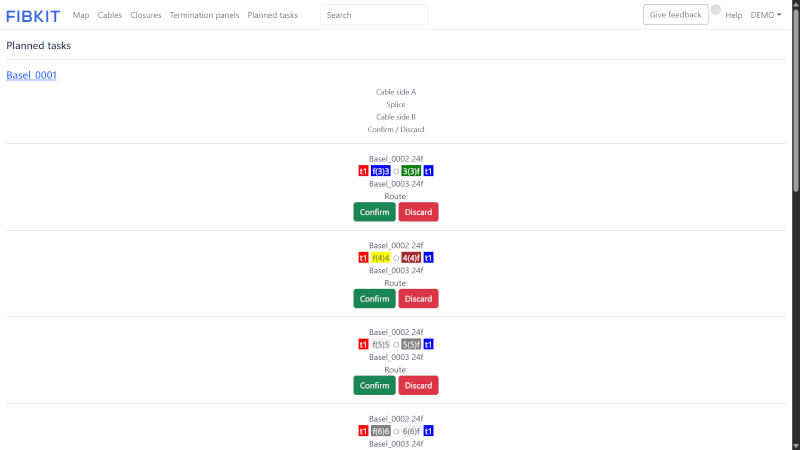
3. Włókna przeznaczone do spawania widok na komputerze
Sprawdzamy na komputerze, czy są prawidłowo zaplanowane spawy włókien. Kliknij w nawigacji Planowane zadania, wyszukaj nazwę punktu spawania i kliknij w nią.
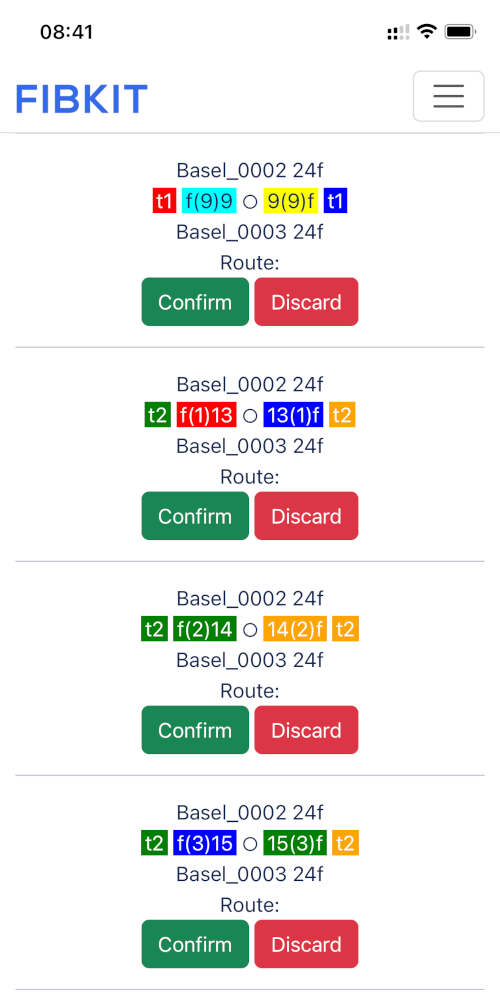
4. Włókna przeznaczone do spawania widok mobilny
Nasza platforma oferuje unikalną funkcję: specjalistyczny widok do łączenia włókien, dostępny na urządzeniach mobilnych. Technicy mogą łatwo przeglądać wyznaczone włókna optyczne do łączenia i zaznaczać zakończenie zadania bezpośrednio na swoich smartfonach, zapewniając aktualizacje w czasie rzeczywistym i tworząc kompleksową historię aktywności.
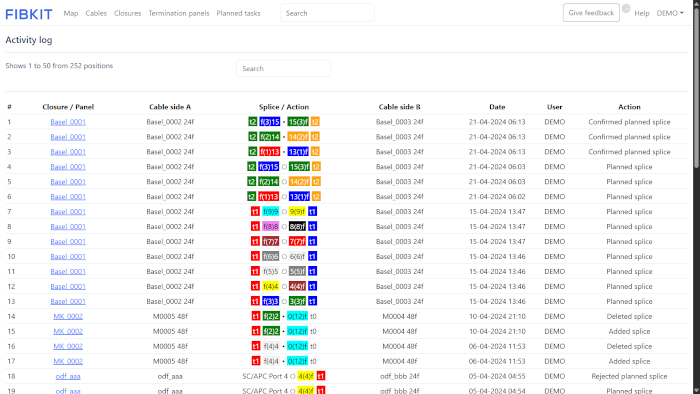
5. Dziennik aktywności
Dziennik aktywności dostarcza szczegółowej historii działań i zmian związanych z połączeniami światłowodowymi, oferując użytkownikom wgląd w wcześniejsze operacje i modyfikacje.
Rozpocznij za darmo
Na dobry początek współpracy – wypróbuj naszą aplikację przez 14 dni bezpłatnie!